

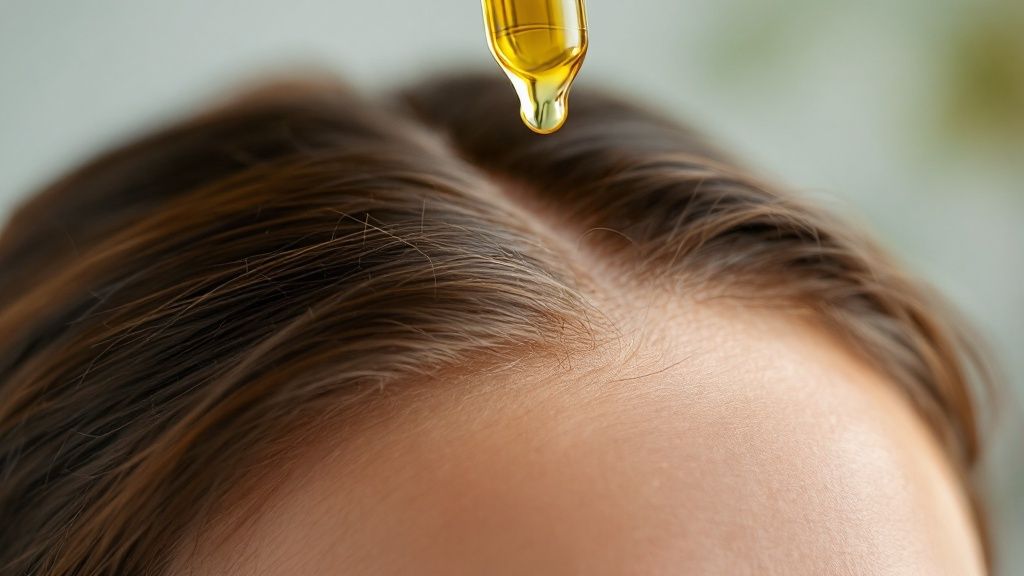
If you're tired of the constant itch and embarrassing flakes that come with a dry scalp, you've come to the right place. A targeted dry scalp oil treatment is one of the best ways to soothe that irritation and get things back in balance. Unlike those harsh shampoos that can strip away your scalp's natural defenses, this approach uses nourishing oils to deliver deep hydration right where you need it most.
It's about providing real, lasting relief—not just another temporary fix.
Finally Find Relief for Your Dry Scalp
Dealing with a dry, itchy scalp is maddening. You've probably tried every "hydrating" shampoo and conditioner on the shelf, only for the discomfort to come right back. I get it. The secret isn’t just about slathering on moisture; it’s about restoring your scalp’s natural ecosystem.
This is exactly why a dedicated oil treatment can be a game-changer. Instead of just covering up the symptoms, it gets to the root of the problem by giving your skin the concentrated nourishment it's been craving.
Moving Beyond Temporary Fixes
My goal here is to help you build a simple, effective routine that actually brings lasting comfort. The right oil and a little know-how can completely transform your scalp's health, and it's much easier than you think.
Here’s what you’ll learn:
- The Power of Oils: We'll dig into why specific natural oils are so brilliant at calming irritation and rehydrating your scalp without leaving a greasy mess.
- A Step-by-Step Routine: I’ll walk you through a clear, actionable plan—from picking the right oil for you to mastering the application and rinsing it out properly.
- Long-Term Scalp Health: You’ll understand how to keep your scalp balanced long after the treatment, stopping dryness and flakes from coming back.
This shift toward prioritizing scalp health isn't just a fleeting trend. The global hair and scalp care market was valued at around USD 103.94 billion in 2024 and is expected to grow to an incredible USD 151.07 billion by 2030. People are finally realizing that a healthy scalp is the foundation for great hair. You can see more details on the hair care market's expansion on grandviewresearch.com.
You are not alone in this struggle. So many of us deal with scalp dryness from environmental stress, styling habits, or just our natural skin type. The key is finding a consistent, gentle routine that works for you.
Get ready to feel the difference from your very first treatment. By the time we're done, you'll have the confidence and knowledge to break the cycle of dryness and discomfort for good.
Choosing the Right Oil for Your Scalp Type
Getting your oil treatment right starts long before you even apply it. The single most important decision you'll make is choosing the right oil. Your scalp has its own unique needs, just like the skin on your face, and what works miracles for your friend might leave your hair feeling greasy or just not hydrated enough.
Let’s move past the generic advice. The secret is to understand what different oils actually do. Some are brilliant at mimicking your scalp's natural sebum, while others act like a super-powered moisturizer for severely parched skin. Your hair type plays a huge role here, too.
Lightweight Oils for Fine Hair
Got fine hair? Or maybe your scalp gets oily but still feels tight and flaky? If so, you already know the struggle. Heavy oils are your enemy, weighing down your roots and creating a greasy mess before the day is even over.
What you need is a lightweight, fast-absorbing oil that delivers moisture without all that heavy residue.
-
Jojoba Oil: This is my go-to recommendation for almost everyone starting out. Its molecular structure is a dead ringer for your scalp's own sebum, meaning it moisturizes and helps balance oil production without ever clogging your pores. It’s a true scalp normalizer.
-
Grapeseed Oil: If you're really hesitant about putting oil on your scalp, start here. It’s incredibly light and non-greasy, packed with antioxidants and nourishing linoleic acid.
-
Argan Oil: Known as "liquid gold" for a reason, argan oil is loaded with Vitamin E and fatty acids. It's a fantastic multitasker—it nourishes the scalp but also adds incredible shine and tames frizz from mid-lengths to ends.
Richer Oils for Intense Hydration
On the other hand, if your scalp is screaming for moisture—we're talking that uncomfortably tight feeling, constant dryness, and stubborn flakes—you need to bring in the heavy hitters. Richer oils create a protective barrier that locks in hydration and provides a deep, soothing relief that lighter oils just can't match.
For a truly thirsty scalp, these are your rescue remedies:
-
Coconut Oil: Famous for its deep moisturizing power, coconut oil can penetrate the hair shaft for intense hydration. A word of caution: it can be comedogenic (pore-clogging) for some, so I recommend it for those with very dry scalps who aren't prone to breakouts.
-
Avocado Oil: This is a thick, luxurious oil that feels like a true treatment. It’s packed with oleic acid and monounsaturated fats, making it one of the absolute best for rebuilding and strengthening your skin's moisture barrier.
Remember, consistency is more important than quantity. A small amount of the right oil applied regularly will give you far better results than drowning your scalp in the wrong one.
Your Guide to the Best Oils for Dry Scalp
Feeling a bit overwhelmed by the options? It's completely normal. To make it easier, I've put together this quick-reference table to help you pinpoint the perfect match for your hair and scalp needs.
| Oil Type | Key Benefit | Best For Hair Types | Consistency |
|---|---|---|---|
| Jojoba Oil | Balances sebum production | All types, especially oily/combo | Lightweight |
| Grapeseed Oil | Ultra-light hydration | Fine, oily-prone hair | Very Lightweight |
| Argan Oil | Nourishes scalp & hair | Fine to medium, dry/frizzy | Lightweight |
| Coconut Oil | Intense moisture penetration | Medium to thick, very dry | Medium-Heavy |
| Avocado Oil | Repairs skin barrier | Medium to thick, severely dry | Heavy |
Think of this table as your starting point. You know your hair and scalp best, so don't be afraid to experiment to find what feels right.
The demand for real scalp solutions is exploding as more people understand the importance of their scalp's microbiome. This has pushed brands to create smarter, more effective formulas using these very same natural oils to calm inflammation and restore moisture. You can find more industry insights by exploring the hair and scalp care market on market.us.
By taking a moment to choose the perfect oil, you're setting yourself up for a dry scalp oil treatment that delivers results you can actually see and feel.
How to Prep Your Scalp for Treatment

A truly effective dry scalp oil treatment doesn't start with the oil itself. It begins with the prep work. This is the secret that unlocks the full potential of any oil you use, making sure every drop of goodness actually gets to where it needs to go. I can't tell you how many times people get frustrated with their results, and it almost always comes back to skipping these simple, foundational steps.
Think of it like this: you wouldn't paint a wall without cleaning it first, would you? The same logic applies to your scalp. Slathering oil over a surface covered in product buildup, dead skin, and tangles just creates a barrier. You end up treating the gunk, not your skin.
Start with Clean, Detangled Hair
Your mission is to create a clean slate. Ideally, you want to apply your oil to a dry or slightly damp scalp that's free of heavy styling products like gels, hairsprays, or caked-on dry shampoo. This doesn't mean you have to wash your hair moments before, but starting with a relatively clean foundation from the day before is key.
Before you even think about unscrewing that bottle of oil, you absolutely must detangle your hair. This is non-negotiable. Trying to work oil through knots causes friction, which can lead to breakage and more frustration than it's worth.
- Reach for a wide-tooth comb or just use your fingers. Always start from the ends and gently work your way up to the roots. This prevents you from yanking on tangles and snapping your strands.
- Divide and conquer. Working in smaller, more manageable sections ensures you don't miss any hidden knots.
Taking a few extra minutes to do this not only protects your hair but makes the whole application process feel less like a chore and more like a moment of genuine self-care.
Pro Tip: I love to gently brush my scalp with a soft-bristled brush before I start. It's a simple move that gets the blood flowing and helps lift any loose flakes, really priming the skin to soak up the oil.
Open Up Your Pores for Better Absorption
With your hair completely detangled, the next little trick is to gently open up your pores. A warm, receptive scalp will drink in the oil far more effectively than a cold one. This one tweak can make a massive difference in the impact of your dry scalp oil treatment.
My favorite way to do this is with a warm towel—it feels like a mini spa treatment.
- Soak a clean, soft towel in warm water. Make it comfortable, not scalding hot.
- Wring it out well so it’s damp, not dripping everywhere.
- Wrap the warm towel around your head and just relax for 5-10 minutes.
The gentle steam from the towel works wonders. It opens up your pores and softens the very top layer of your skin, creating the perfect runway for the oil to sink deep and deliver all those soothing, hydrating benefits right to the follicles. This sets the stage for a truly successful treatment.
Mastering Your Scalp Oil Application
Alright, let's get our hands dirty—literally. A truly effective dry scalp oil treatment isn't about just dumping oil on your head and hoping for the best. It’s a specific technique, one that ensures every single drop gets right to the skin where it can do its job, instead of just greasing up your hair.
The whole point here is precision. We want to get the oil directly to the root of the problem, avoiding that weighed-down, oily feeling that happens when the product just sits on your hair shafts. This method not only feels better but also makes your oil last way longer.
The Section and Apply Method
The secret weapon for a perfect application? Parting your hair. Creating clean sections gives you a direct runway to your scalp, making sure the oil can actually sink in and get to work. You don't need fancy tools for this; a regular comb or even just your fingertips are all it takes.
Start by parting your hair right down the middle. Take your dropper or dip your fingertips in the oil and apply a few drops along that part line. Seriously, a little goes a long way here. We're thinking in drops, not streams.
Once the oil is on the part, use the pads of your fingers to gently spread it out a bit before moving on. Now, create a new part about an inch over from the first one and do it all again. Keep repeating this process—part, apply, spread—across your entire scalp. I usually work from front to back and then get the sides.
The number one mistake I see people make is using way too much oil. Your goal is a thin, even layer that makes your scalp feel nourished, not like an oil slick. If it's dripping down your forehead, you've gone too far.
This focus on targeted scalp care isn't just a niche trend; it’s driving a massive market boom. The scalp care industry is expected to explode from USD 14.73 billion in 2025 to a whopping USD 23.81 billion by 2032. That's a clear sign that people are finally realizing that a healthy scalp is the foundation for healthy hair. You can dig into the numbers yourself and explore the scalp care market analysis at coherentmarketinsights.com.
The Five-Minute Scalp Massage
Now for the part that feels amazing and makes the treatment work so much better. Once the oil is on, it's time for a massage. This isn't just for relaxation; spending just five minutes on a gentle massage is what truly activates the treatment. It boosts blood flow to the scalp, helps the oil penetrate deeper, and even helps lift away some of those loose, dry flakes.
Here’s how to get it right:
- Use the Pads of Your Fingers: Your nails are a no-go. They can cause tiny scratches and make irritation even worse.
- Apply Gentle, Firm Pressure: You're not just rubbing the surface. Use slow, circular motions to actually move the skin over the bone beneath it.
- Cover All The Ground: I like to start at the hairline and slowly work my way back to the nape of my neck, making sure every inch of my scalp gets some attention.
This simple infographic breaks down the core steps, from the first drop of oil to the final rinse.
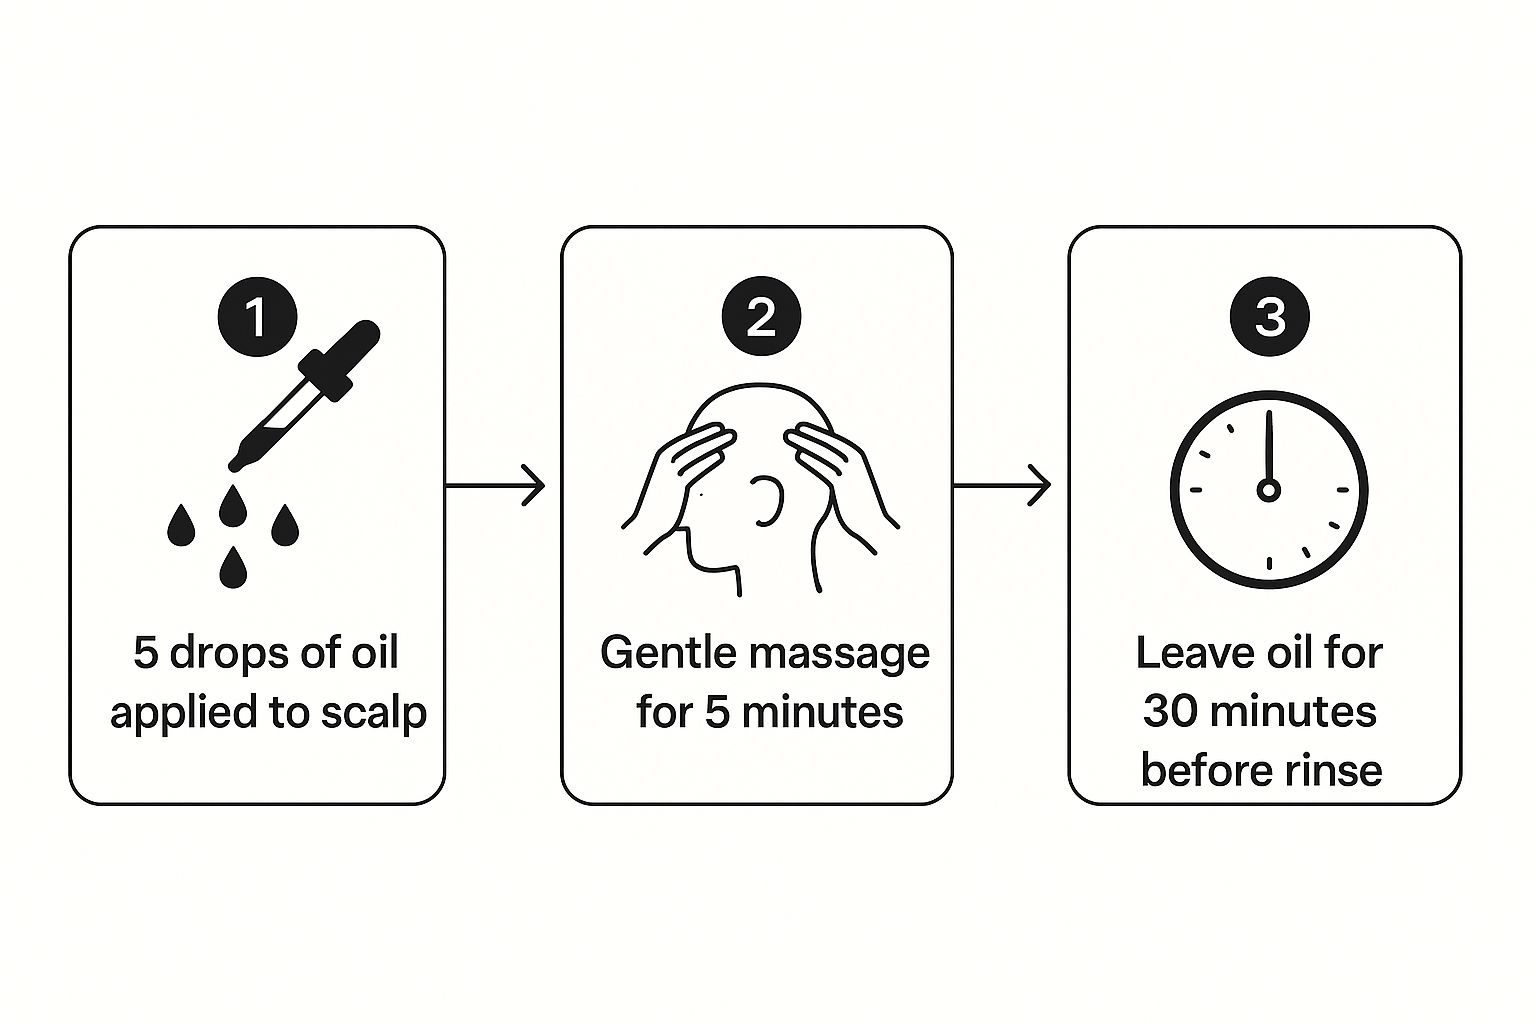
As you can see, the process itself is simple: apply a bit of oil, massage it in, and let it sit. That massage is the game-changer, turning a basic application into a genuinely therapeutic ritual. Once you get this technique down, you'll ensure your scalp gets every last bit of goodness from the treatment.
The Best Way to Rinse and Care Post-Treatment
https://www.youtube.com/embed/JVrAjAfrCvQ
So, you’ve let that nourishing oil work its magic, and your scalp is finally feeling calm and happy. Now comes the part that’s just as crucial as the application itself: rinsing it all out the right way.
This is where so many people accidentally sabotage their results. They go in with harsh shampoos or scrub way too aggressively, stripping away all the wonderful moisture they just spent time putting in. It’s a classic case of one step forward, two steps back.
Getting a heavy treatment oil out of your hair might seem like a challenge, but I promise there’s a simple trick that completely changes the game. It’s the secret to avoiding that greasy, weighed-down feeling and ensuring your scalp stays hydrated, not stripped bare. Let's lock in those benefits.
The "Emulsify First" Technique
The single biggest mistake you can make is hitting your oiled-up hair with water before you even think about shampoo. We all know oil and water don't mix, right? The water just creates a barrier, making it impossible for your shampoo to get in there and break down the oil.
This usually leads to a frustrating cycle of shampooing two, three, or even four times, which is incredibly drying for a scalp that’s already begging for moisture.
Instead, you need to try the “emulsify first” method. It might sound a bit technical, but it’s actually dead simple. You’re going to apply your shampoo directly onto your dry, oiled hair and scalp before a single drop of water touches it.
Seriously, just work the shampoo right into your roots and scalp, massaging it in just like you did with the oil. You'll notice it won't lather up as much as usual—that's totally normal. What's happening is that the shampoo's cleansing agents are grabbing onto the oil molecules, breaking them down so they can be rinsed away easily.
This one small change is everything. It allows the shampoo and oil to mix into a milky emulsion. When you finally add water, the whole mixture rinses out cleanly in one shot, leaving your scalp perfectly balanced and your hair soft, not greasy.
Once you’ve massaged the shampoo all over your oiled scalp, then you can start adding lukewarm water. Keep massaging as you rinse, and you’ll feel the oil and shampoo wash away completely without a fight.
Post-Rinse Scalp and Hair Care
After you’ve shampooed, your scalp is clean but also in a delicate state. Following up with the right conditioner is absolutely key to putting moisture back in and keeping that skin barrier healthy and strong. And this isn't just for your hair—a good conditioner will soothe your scalp, too.
Look for conditioners packed with ingredients known for hydrating and calming the skin. A few of my favorites are:
- Aloe Vera: This is a classic for a reason. It’s incredibly soothing and helps calm down any lingering irritation.
- Hyaluronic Acid: Just like for your face, this powerhouse ingredient helps your scalp hang on to precious moisture.
- Shea Butter: A fantastic emollient that deeply nourishes both the skin on your scalp and your hair strands.
Above all else, please stick with sulfate-free products. Sulfates are harsh detergents that give you that big, foamy lather but can seriously dry out your scalp. They will completely undo all the hard work you just put in with your oil treatment.
Think of it this way: using a sulfate shampoo after an oil treatment is like putting on a rich moisturizer and then immediately washing your face with dish soap. It just makes no sense. By choosing gentle, nourishing products for your post-rinse care, you’re making sure your scalp stays calm, hydrated, and flake-free for the long haul.
Common Questions About Scalp Oil Treatments
It's totally normal to have questions when you're starting a new dry scalp oil treatment. Even with a solid routine, getting the small details right—like how often to do it and for how long—is what truly makes the difference. Let's walk through some of the most common things people wonder about so you can feel completely confident.
Nailing these specifics is how you go from just trying a treatment to mastering a routine that brings consistent relief.
How Often Should I Use a Scalp Oil Treatment?
Honestly, finding the perfect frequency is a bit of a personal journey. It really comes down to your scalp’s unique level of dryness and how your hair reacts. There’s no single right answer, but I can give you some excellent starting points.
If you’re dealing with serious dryness, itching, and flakes, I'd suggest starting with treatments 2-3 times per week. This more intensive approach gives your scalp’s moisture barrier a much-needed boost and helps calm down that inflammation quickly. Once you see a real improvement after a few weeks, you can usually dial it back to once a week for maintenance.
On the other hand, if your scalp is only a little dry or you’re just looking to keep things balanced, once a week is the perfect sweet spot.
Can Oil Treatments Make My Dandruff Worse?
This is a fantastic question and something that trips a lot of people up. The short answer is: it depends on why you have flakes.
If your flakes are from simple dryness—think small, white, and powdery—then yes, a good oil treatment is exactly what your scalp is crying out for. It will rehydrate the skin and stop that flaking.
But if your dandruff is caused by an overgrowth of Malassezia (a common scalp fungus), some oils can actually make it worse by feeding the yeast. This kind of dandruff usually looks like larger, yellowish, and sometimes greasy flakes.
If you think your dandruff might be fungal, stick with oils that have natural antifungal properties. Tea tree and rosemary oil are great options, but make sure to dilute them in a lightweight carrier oil like jojoba. When in doubt, a quick chat with your dermatologist is always the best move.
How Long Should I Leave the Oil on My Scalp?
You can really tailor the timing to fit your schedule and whatever your scalp needs on a given day. Both short and long applications have their own perks.
- A Quick 30-Minute Session: This is my go-to for a quick refresh or when I'm pressed for time. Believe it or not, 30 minutes is plenty of time for a good oil to work its magic on the top layer of your skin, especially if you spend 5 minutes massaging it in to really boost absorption. It’s perfect for a mid-week pick-me-up.
- A Deep Overnight Treatment: For a serious dose of hydration, leaving the oil in overnight can be a game-changer. This gives it hours to penetrate deeply and deliver maximum nourishment. To avoid a mess, just apply the oil, wrap your hair in a silk scarf or a shower cap, and then wash it all out in the morning.
My advice? Start with a 30-minute treatment and see how your scalp feels. From there, you can experiment with leaving it on longer until you find that perfect duration that leaves your scalp feeling calm, happy, and hydrated.
At Lunarie Skin, we’re all about helping you get that healthy, balanced scalp using clean, effective ingredients. Our products are thoughtfully formulated to soothe dryness and bring back your natural glow.


